Popular Posts
-
Let me know what you think: is this a penguin or an owl? Help me decide. Leave a comment with your vote: most votes decides for me. He is ma...
-
I have a little plastic composter purchased from the county, and it has a little door in the bottom where you're SUPPOSED to be able to ...
-
I had four different projects to finish for a show at our co-op gallery's latest show, "Barely Human." It's a celebrat...
-
I got this idea from a kids' craft site. They made penguins from wooden eggs. I had purchased these speckled plastic eggs as doll he...
-
Started a little dress from a pillowcase today. Worked on it when I was away from home, so I basted a binding strip from the armhole cut-...
-
Three faces! And that's not even counting the outermost face. I believe, in this picture, the face below the other two was actually ON a...
-
http://inlinethumb49.webshots.com/47408/1084155738043399186S600x600Q85.jpg
-
This doll was sold as a piece of fabric that the buyer cut out at home and sewed together; my friend Karen generously gifted me with it the ...
-
According to my online research, "Tuck Comb dolls," are classed, along with other "peg woodens, or pennywoods" as Grodn...
Sunday, July 31, 2011
Working on that Covered Vinyl Head Again
Change from the way she looked on March 9.
I am not finished with the face on this doll. I have more work to do on the eyes. I think they are too dark now, so I'll lighten them up the next time I work on her.
Saturday, July 30, 2011
Friday, July 15, 2011
A Class to Dye For!
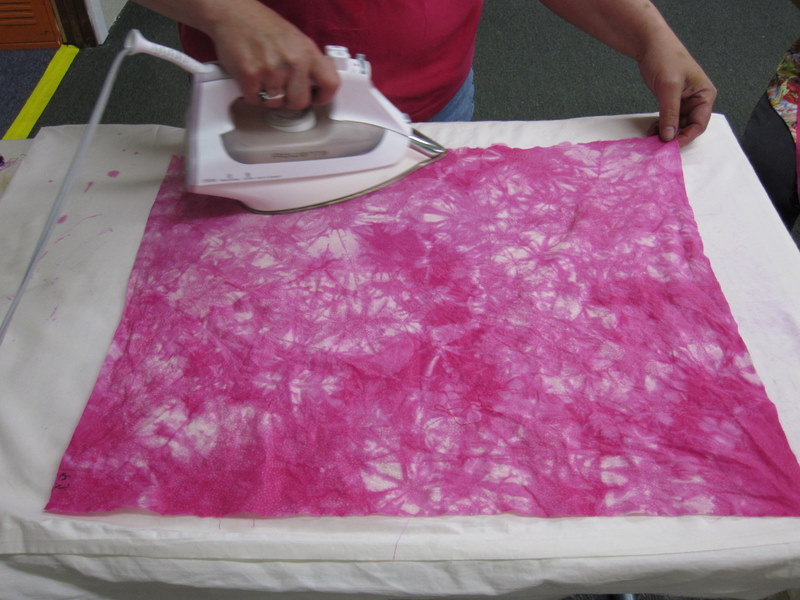
Took a fabric dyeing class today at Quilt Harbor (Aberdeen, WA). It was taught by Val Fox-Armey and lasted all day. We dyed eight pieces of fabric (fat quarters) using eight different techniques. Here are some pictures.:
In these pictures, we are doing our first project, which was producing our "ombre" pieces, which are made by immersing the entire piece of fabric into a bucket of dye, and then bit by bit, withdrawing it, while adding more dye to the bucket. It results in a graduated, monochromatic piece.
This is my spider web piece, with its first color added.
This is my folded piece; can you tell I like red?
My folded piece drained on a paper towel, and left this lovely imprint that looks like a rose.
When the towels were unfolded, this series of "roses" emerged.
This was Karla's painted piece, waiting for its salt.
This is my scrunched piece, seasoning in a plastic bag until tomorrow.
Kay's scrunched piece, after rinsing and being ironed.
My clamped piece with the wooden whirls, seasoning in a bag til tomorrow.
Karla is adding a color to her piece that is wrapped on a pole and then scrunched together.
The Three Amigos and their Ombres.
"Look distressed," Val said. So I did.
But I wasn't. I LIKE paint on my clothes!! It looks creative!!
Sunday, July 10, 2011
I DID Finish Him!
I finished my boy and he is now in the one month show at Harbor Art Guild's gallery in Hoquiam, WA. It's an unthemed, unjuried show called "Anything Goes." I wish I'd taken his picture before I took him over there, but I forgot, and then forgot the two more times I've been there since. But I will take a picture of him this week for sure, and when I do, I will add it to this post. He turned out cute, I think. I still want to make him a little hat.
Wednesday, July 6, 2011
Alabama Baby Boy's Clothing Begun
Tuesday, July 5, 2011
Doll Done, Clothing Next, and Something Else, too
Here he is. Without clothes, and waiting.
Another thing I'm doing is having this blog, so far, printed into a book by SharedBook. I'd like to have a printed copy for each of my three grandgirls, but so far I've just ordered one. I've paid and they will send it to me in a few weeks; I will decide then if I want to go with them for the other copies. It's VERY cool to just have them arrange it immediately into a book for you to look at online! I deleted a few posts that were just reminders about some passing thing, and I decided not to have a Table of Contents, as it went on for pages and pages. So I am looking forward to getting the copy in the not-too-distant future.
Monday, July 4, 2011
While the Boy is Drying, a Snowman is Begun
I used to just put a snowman face, buttons, and hat on an old-fashioned pear-shaped lightbulb, but they seemed so fragile. This year I decided to put a fairly thin layer of PaperClay over the glass. This not only should make it a little less fragile, but I can flatten the bottom so he can sit. I may still make some without the PaperClay, as Christmas Tree Ornaments.
Stay tuned.
Subscribe to:
Posts (Atom)