


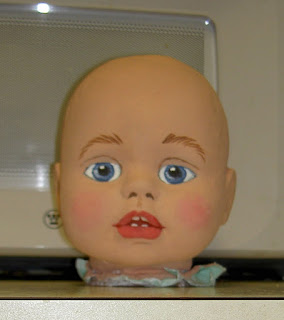
This is the vinyl thrift store doll head, I began with. I had already covered her face with Elmer's Glue, ready to cover it with T Shirt knit cloth, when I remembered (!!!) that I wanted to document the making of this doll. SOOO, I wiped off most of the glue--it's still on her eyes and lips--and quickly took a picture before continuing. I wish I didn't do this so often--start without taking pictures. The head WAS on a doll, too, but, of course, I took her apart before thinking to take a really "Before" picture. I'll try to do better next time.
The next step was to brush the glue back on her face and begin to put the cotton knit fabric over the vinyl:

Now the head is nearly all covered with the knit. I did put some batting, over the eyes/under the knit, so the eyelashes didn't show under the fabric. I could have removed the eyes completely, but chose not to. I have done that before, to use the eyes for something else, but it involves damaging the face quite a bit. I suppose heating the head in an oven might allow you to remove the eyes AND preserve the integrity of the face/head, but I've never done that. I only know that people who do reborn" dolls put them in the oven to set the heat-set paint and the vinyl doesn't melt at 225 or whatever.
I covered the top of the head with a circle of knit fabric, and then the head needs to sit until the glue is dry.

One important thing to remember in covering the head is to use one brush to put on the glue, and another, clean, dry, stiffer brush to enourage the knit to cling to the indentions on the vinyl--you do this by "poking" at the fabric-covered indentions with the stiff dry brush. The fabric stretches quite easily to cover the head without wrinkling, but you don't want to stretch it TOO tightly. Practice will allow you to tell how much you can stretch the fabric. Judi Ward says that the T shirt cotton that is 5% lycra stretches a little better. Where there is excess fabric, you trim it so that edges will butt together, rather than folding under or overlapping layers of fabric. You are aiming for as smooth a surface as possible
The next step is to paint the cloth-covered head with gesso. Gesso fills in the airspaces that all fabric has between its threads and it seals the surface so the paint won't soak into the cloth--it will now stay on the surface where you want it to.
Once the gesso is dry, sand any rough areas, and put on more coats of gesso if you think it needs it. Always allow the gesso to dry and then sand lightly between coats. When you are pleased with the smoothness of the surface, you can then paint the head. I use acrylics although some people prefer oil paints. I usually am happy with two coats of gesso but I've heard of people using 20 coats or more. (I wish I could insert a cross-eyed face here, but I can't.)
Here is the (almost) finished painted head--she still lacks eyelashes (and a body!!):
Her head sat in that same shape for some months while I worked on other necessary, more urgent projects. Finally, I bought a pattern for her body, Judi Ward's ByeLo pattern, and that gave me a basic, simple pattern to use, although I had to enlarge it quite a bit. Once I got the body sewn together, I could see that it was too short for this doll's head, so I lengthened it three inches by cutting the body front and back in the middle and inserting a 3" band between the tops, and bottoms of those pieces. THIS IS NOT THE METHOD I RECOMMEND for getting a doll's body the correct size, but sometimes I just estimate wrong and this is my own doll, so I don't have to please anyone except myself and I'm not a perfectionist---I prefer this situation. If I had been making this doll for someone else, I would have felt it necessary to cut an entire new body in the proper length.

As I type this, her arms have an initial coat of gesso and are drying on our fireplace (natural gas); the first coat of gesso takes awhile to dry, as it is soaked into the threads of the fabric. The second coat dries quickly as it stays on the surface. The paint will also dry quickly; sometimes I hurry things up with a hair dryer. Some people pop things in the microwave to dry, but I really prefer not to do that. I like to keep kitchen utensils and art utensils separate.
I WILL need to lengthen her legs later, to make them proportional to her lenthened body, but she has an important appointment to appear in a ReCycle, ReArt show tomorrow, so her too-short legs will have to do for now. As usual, I'm "pushing the envelope" on this project--it's the only way I seem to work, although I don't recommend this way to anyone else.
Luckily, this baby, yet unnamed, is big enough to wear real baby apparel and so I do not need to sew clothes for her!! Yay! Carrying her, it occured to me that I should have put some sand in her behind, to give her a more realistic weight. I know Waldorf "heavies" weigh about five pounds, and kids like carrying them around because of the weight.
Anyhow, this is where I am on this project now. The next picture you see, she will be just about done. This is the third rather big project I have finished lately. You can see the other two on Thursamknitters.blogspot.com That's my other blog. Happy New Year; I'm on a roll!!
It looks great so far! I wish I knew how to paint faces like you do. Because I am a beginner I am quite unknowledgeable about all these doll things. I need lots of help. HELP!!
ReplyDeleteThat looks like a LOT of work! I made a Re-Born Doll one time and it was hard enough. I still need to put hair in and eyelashes with the Spiked Needles. I like how you painted the face.
ReplyDeleteI will ask Hilary if she will do a demo on faces at our next doll meeting, Leslie.
ReplyDeleteMary, this is not anywhere NEARLY as difficult as making a reborn!!!! My friend Stephanie makes them and I KNOW what goes into those. If you try this, I know you will agree with me.